Saturday, November 14, 2009

Hoppy Holiday Treats!

Good Morning.   Just wondering if anyone else has started their Christmas shopping?  Me?  NOPE!  And my DH told be last night he expected HANDMADE cards to be sent out to his family this year!  I usually only share my handmade cards with other crafty friends.  But I guess that's about to change by proclamation of King Fred, teehee.  I hope you are further along than I am.

I hope one of these projects inspire you to get started if you haven't!

Hoppy Holidays Treat Box for challenges on the
Designed using Mistletoad by FCD.  Sold out right now, but Pamela says she is getting more in.  So keep checking back if you love this little guy.  Isn't this a cool image.  It looks like he's crawling up the treat box.  I couldn't help but add a little texture.  I used liquid applique on the hat band and Prisma Glitter on the fur ball at the tip of the hat.  I think the ribbon is American Crafts.  I've had it forever and was so happy to use it today!


Glory to the Newborn King designed for challenges posted at
This card was designed using one of FireCracker Designs by Pamela's new digis.  You can check out all of Pamela's Digi's HERE.  Just scroll down on that page to see the manger!  Combined with the sentiments from Christmas Phrases by FCD.  I used yummy Pearlescent Chocolate embossed with clear for sentiments.
I colored the digi with Prismacolor Pencils and OMS.


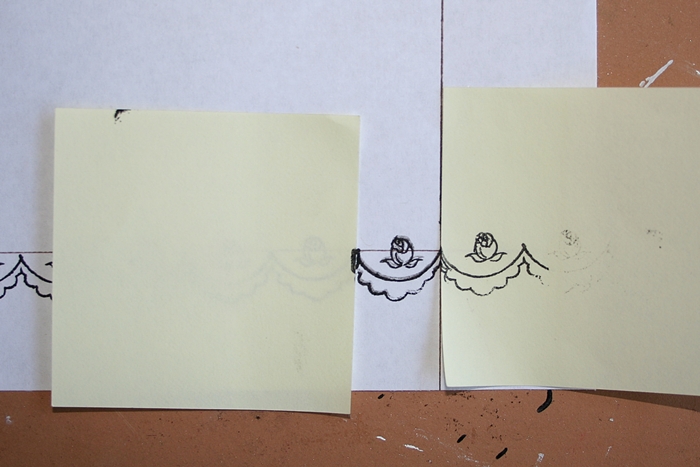
Last Minute Gift Labels
You can make your own by stamping on these standard mailing labels by Avery.  OOPs, I just realized I didn't draw the lines to "hang" the ornaments.  This tiny bulb came with my Christmas Phrases set by FCD.


Wednesday, November 4, 2009

StampTV / Center Stage Spotlight DT Blog Hop!

Welcome to our first Center Stage Spotlight Design Team Blog Hop!
Blog Hop begins November 4th 10pm CST / 11pm EST
Jessica Fick, the Design Team Coordinator for GinaK Designs has issued a challenge to all of the past and present CSS team members to make a Christmas card with one of these sketches:


I used Magic of Christmas Stamp Set for my card.
You can view the a photo of the stamp set and project details at the bottom of the post.
Here is another card I designed using this set.


We know you're going to LOVE what everyone has designed for us tonight!  So check out some of the other blogs listed below!


First, here are the links for GinaK's Current CSS Team Members:

and the links for all of the past CSS Design Team members participating:

Some of GinaK's Senior Design Team Members and Illustrators wanted to get in on the fun tonight too:

along with Nina Brackett's Guest Designer: Lisa Hjulberg

All of these gorgeous cards from the entire team will be added to the StampTV gallery throughout the next few days with the tag cssjf1 (which stands for center stage spotlight jessica fick 1)

These sketches are also our sketch challenge for this week, so be sure to check out all the information in the discussion in our Challenge group over on StampTV Thursday morning.  We'd love to see your cards with the sketch too!

Project Details :


Card #1
Paper : embossed cardstock Bazzill, Snowflake DP - Reminisce
Other : Spellbinders Die, Silver Stickles
Colorization : Prismascolor Pencils with OMS

Card #2
Paper : K&Company (gold text paper), Red and Gold glossy paper - stock
Other : Spellbinders Die, EK Success Border Punch, Gold Stickles
Ribbon : Offray
Technique : Stamp and emboss images on red glossy paper and cut ornaments.  Stamp ornaments again onto gold glossy paper, then glue red ornaments over stamped image.

Wanna see a few more idea's using this set and some of the images I didn't use?  I found some inspiration over in the StampTV Gallery!

Sunday, November 1, 2009

Moving on to Christmas!

Hi ladies.  I hope everyone had a safe and fun weekend.  I got busy designing some Christmas Cards for some challenges.  I have 3 more almost completed for other activities coming up this week.  Impression Obsession is doing their DT blog hop on Thursday (I will have to post mine on tuesday).  There is a StampTV Blog Hop on Thursday I'm participating in and I will be posting my weekly FCD project saturday.  I created Christmas Cards for all of these!  I can't wait to share them with you and I hope you have started yours, if not, then maybe you will be inspired to get started this week!
 I'm going to start out just listing the challenges and photo.  I will post details at the bottom.  So here we go!
 "Oohlala" wanted to see a Victorian Christmas Card for Challenge #39
 "Ready Set Stamp" had a long list of "ingredients" required for Challenge #8 : Christmas, use colors lilac, black, & silver, snowflakes, a 2" x 4", & crackle.


Victorian Angel Card

Inspirational Card Sketches (icsketches) - I used sketch #40
Cooking it up with Katie Challenge #4 required the following recipe :
Christmas, sparkle, and a border!


The Magic of Christmas

I found all of these challenges through "The Daily Dare" Challenge Blog.
Deb Felts is so awesome to keep up with all of this and provide this service for us!
Thanks Deb!

Project Details
Victorian Christmas Card
I think this is the first time I've done a non-traditional color Christmas card.  I really like how it turned out!  Using the 2"x 4" panel  made it a little trickier for me, I ended up with an over all card size of 6 1/4" x 4 1/4".  I had a lot of fun using UTEE to create the crackle!
Stamp Set : Inkadinkado
Paper : Vellum snowflake paper by Making Memories, purple and silver glitter paper not labeled (I picked it up at Joann's this past week), black shiney cardstock not labeled (I found it in my stash).
Ribbon: I found the really cool snowflake garland at a local stamp store - A Small Cleverness.  It's made by May Arts.  The purple sheer ribbon was purchased a local craft store.
Embellishments : Purple floral is by offray (I found it in the ribbon dept. at Joanns)
Border Punch : Martha Stewart
Title : rub-on by "royalbrush.com"

The Magic of Christmas
I decided I wanted to "get warmed up" for the StampTV Center Stage DT Blog Hop on Thursday, so I used a couple of images from "The Magic of Christmas".   I will be posting another card using this set on  Thursday.  Isn't this a beautiful stamp set!


I started with the gold blingy paper by K&Company.  I loved all the Christmas sentiments on it.  The sketched used a circle.  But never be afraid to think out of the box and substitute a different shape for a sketch.  I used one of my Spellbinders Labels Sets.  I love Spellbinders!

Stamp Set : GinaK Designs
Paper : K&Company and EK Success (gold and red)
Ribbon : unknown
Ribbon Charm : unknown
Border Punch : EK Success
Gold Stickles

Friday, October 30, 2009

Just Breathe Week 4


This is my last project using Just Breathe.  I hope you have been inspired to use this set this month.  I was trying to think out of the box again and design something with this set you might not expect.  In addition, if you haven't started making your Christmas cards yet, I hope this one will inspire you to get started!!  This card was so quick to put together and I really like how it turned out.


Stamp Set : Just Breathe by FCD
Ink : Palette Noir
Paper : Green - My Minds Eye, Red - Prima, Black CS
Tools - Spellbinders
Sticker Jewels - Stampendous
Ribbon - Unknown

This one is so simple I don't think you even need instructions!

See you next month with 4 more projects using one of Pamela's awesome stamp set!!

Crafty Secrets Design Team Challenge!

Good Morning Ladies.
I'm very excited this morning to be participating in the Crafty Secrets DT Challenge as a Guest DT Member!  The challenge was to create something using birds.  Well the hardest part was trying to decide WHAT to use, because Crafty Secrets has lots of products with birds included.  I narrowed it down to 3 stamp sets!  teehee.   I know this post is way tooooo long and I probably should have just used one project, but I couldn't help it.  I figured you are only a Crafty Secrets Guest DT member once!!  Right!  


Make sure you check out the other DT Member links at the bottom of the post and the Crafty Secrets Blog.  I heard there was some yummy blog candy being given away at 1 of the DT blogs and by Sandy on the Crafty Secrets Blog!! 


I used the Christmas Joy stamp set on this card.  I also used paper from one of Crafty Secrets Paper Pads.
Check out the photo of the stamp set below to see how I layered the images.   I used Eclipse masking to build this scene.  You stamp the image that will be in the for-front first - bow, stamp it again on the tape, cut it out, and then cover the bow on your card before stamping the next layer.  Continue building in this manner.  I also used the holly to create a border.  Isn't this set awesome with so many possibilities.  I used it to create a layout in an early post.  If you want to see that, you can go HERE.


You can view more of my Cardboard Art HERE.

You can view more of my Collage / Mixed Media projects HERE.


I used Bird Notes on this friendship hanging decor project.  I used a swirly for the wings from the Mini Memories stamp set.  I used a swirly from the Flourishes stamp set on the corner of the bird house.  I started out with corrugated cardboard to create the bird house.  Tear off part of the surface paper to reveal the waves below, layer on acrylic paint, and glimmer mist to get the distress look.  I sprayed some white lace with glimmer mist as well and adhered to the base.  The bird dies are Spellbinders.  I have created a layout using this set in an earlier post that you can see HERE.


I used the Thanksgiving stamp set on this 2 1/2 x 3 1/2" Artist Trading Card.  I love using my stamps to create all kinds of projects, including ATC's.  I just thought this turkey and the sentiment were too cute.  The background is crackle paint distressed with some brown ink.   You could easily put this one a card as well.  To see a layout using this set go HERE.

Thanks soooo much for taking time to check out all my Crafty Secrets Projects.
To see more awesome projects in this Crafty Secrets Blog Hop and to qualify for some Blog Candy, make sure you check out the rest of the DT's Blogs.  These girls are awesome and it was so much fun to have the opportunity to play along with them!


Tune in tomorrow for my next FCD project!!
Have a great day!

Monday, October 26, 2009

Crafty Secrets Baby Girl Card and Layout

Hi ladies.  Today I'm posting a  Layout I created using one of my Crafty Secrets Stamp Sets - Baby Girl Clear Art Stamp Set.  Check out the actually stamp set at the bottom of the post, so you can see how I used it.


Frame and Masking Tutorial
I began with my photo and matted it.  Next I had to determine the width of the frame around the photo.  The sides had to match the width of a series of the scallops if I wanted to finish the corners nicely.  If you take a look at the photo of the stamps for this set, you will see that the scalloped image as 6 scallops.  I stamped the image twice on a piece of scrap paper, end to end to help figure the measurements of the frame. 


I liked 7 scallops across by 10 scallops vertically.  So I measured across from edge to edge for 7 scallops, that equaled just short of 4", and again from edge to edge for 10 scallops - 5 5/8".  So now I had my measurement for my guidelines of the frame.  I cut a piece of white cardstock 6" x 7.5"  and penciled in my guidelines, creating a 4 x 5 5/8" rectangle (I used a pen on mine so it would show up for the photo).  You want the pencil lines light enough so that you can go back later and erase it.  When I am drawing squares or rectangles I use a tool called a t-square.  It is a drafting tool that allows you to have perfectly aligned edges.  And you can read more about how to use it HERE


So now I'm ready to stamp the scalloped border. 
In order to stamp the image along the penciled line, you need to mount your stamp on an acrylic block with lines on it.


You will line the white line on the block with the penciled line on the paper.  You might want to practice a couple of times before stamping on your project.  Practice by drawing a pencil line on a scrap piece of paper and see if you can stamp your image along that line.  Standing up over the stamp/block, helps you to be able to line it up.  Once you are confident you have that skill down, you are ready to stamp around your guidelines. Start in the left lower corner and stamp the first 6 scallops. 


In order to stamp just one more scallop, you have to mask off the 2 ends as shown below.  I know mines a little messy, but I was in a hurry to finish these tutorial photo's.


Take the post-it note mask off and stamp up the right side 6 more scallops.


Mask off 2 ends so that you can stamp 4 scallops to equal 10 up the right side.


Remove the mask and stamp 6 scallops along the top.


You will continue masking and stamping around the frame until you finish down the left side.

Here are some more details.  I love using stamped images to create my own little embellishments!


Patterned Paper : Crafty Secrets, Daisy D, Flower Bazzill
Ribbon Hobby Lobby, Spellbinders scalloped dies, Deckeled sissors

Wednesday, October 21, 2009

Just Breathe Week 3


Hello and welcome back for another project using Just Breathe by FireCracker Designs by Pamela.
If you missed last weeks project, check it out HERE.

So for project #3 I built another scene.  This time I imagined sitting on the rock and gazing out into a field of wild flowers.  I love the sentiment this set comes with.  And the "blossom and grow" part seemed to fit for a field of wild flowers. 


Supply List:
Stamp Set : Just Breathe by FCD
Ink : Momento Sky Blue and Momento Bamboo Leaves.  Palette Noir.  Brilliance Hint of Pesto.
Colorization : Prismacolor Pencils with OMS and Shimmerz
Tools : Brayer, Dove Blender Pen, Liquid Pearls, Pop Dots.

I brayered top 1/2 of the card with Sky Blue and lower 1/2 with Bamboo Leaves onto glossy paper.  Honestly the green was a little to bright and I was afraid you wouldn't be able to see the flower stems since they would be green as well.  So to tone it down, I used a sponge and smeared on white and a tad of brown.  I used Brilliance Hint of Pesto and stamped the stems.  I added clouds using the cloud stamp.  I stamped the girl/rock on white cardstock and colorized with Prismacolor Pencils and OMS.  Added Shimmerz.  I adhered the bottom part of the image flat and used some pop dots at the head and shoulders.  Stamped sentiment and distressed edges and adhere with pop dots.  I stamped butterfly with Palette Noir and colored in with Dove Blender and pink ink.  Last but not least, I added my wild flowers.  The stamp set doesn't come with a flower stamp, so I used Liquid Pearls

Have a great Thursday and I'll be back Saturday with another Crafty Secrets Layout!

Thursday, October 15, 2009

FCD BLOG HOP!! - Just Breathe Week 2

Good Morning and welcome to FireCracker Designs by Pamela's Monthly Blog Hop!

(The official start time of the FCD Blog Hop is Friday at 8:00am (EST). If you have arrived early, please be patient, as all the links may not be live until 8:00am (EST).)

The October DT assignment was to use mesh.  See my book mark below for my "mesh" project.  All 9 of us will be sharing projects created with this theme in mind. And the best part for you is Pamela will be giving away some awesome blog candy. But to qualify for the drawing you have to post comments. She will randomly pick one of our blogs, and then randomly pick from all the comments posted on that blog. So you will want to read ALL the BLOG HOP details at the bottom of my post and leave comments on each of the blogs to qualify for the drawing. Make sure you leave your email address in your comment!
Pamela is offering a coupon code today.
code :  hopidays
Use this code at check out to recieve a 15% off discount thru Monday at 8pm!  This discount does not apply to magazines.
With the release of Pamela's New Christmas sets it couldn't be a better time to place and order!


I like to show how versatile a set can be, when I can.  So, I try to create projects using my stamps on projects beyond cardmaking.  So for this weeks "Just Breathe" project, I decided to design some manly gifts.
I purchased a wood plaque for .99cents at Hobby Lobby for this great desk top decor.  The sentiment is NOT part of the set.  I picked that up at Hobby Lobby as well.  I loved the play on words for the trees, tree branches provide shelter and the tree cast a shadow.  I used Spellbinders die to cut that shape.  I used dusters to apply green and brown ink around the edges.

I also thought a book mark would make a nice manly gift.


I found some sticky mesh in my husband's workshop.  Apparently it's used to for dry wall.  It worked perfect as a mask for this project.  I placed it over some green cardstock and sprayed with glimmer mist.  I peeled it off and I got this cool mesh looking background. I know I will be trying this again!!  Funny though, I designed this for a guy, and my daughter seen it and wants it.  So, I promised it to her!

I have 2 more projects coming up for you using this set this month, so stay tuned!
If you like this set, check it out HERE!  This set is $8.99, untrimmed/unmounted!
Check out all Pamela's products and great prices.  It's so easy to order from her online and she ships fast!


I know this is a long post.  But I'm excited about another stamp set of Pamela's that I've been designing with.  It's a fruit set, FRUIT CUP,  and so far I have designed 5 cards with it.  I will be revealing all my projects for this set Saturday.  So please stop by and see me again.  This is such a great set with fun sentiments to go along with the different peices of fruit.  If you want to take a sneak peak at the stamp set you can see it HERE.  This set with 29 images is $12.99 untrimmed/unmounted!!  Awesome deals ladies!

Blog Hop Details ...
The official start time of the FCD Blog Hop is Friday at 8:00am (EST). If you have arrived early, please be patient, as all the links may not be live until 8:00am (EST).
This is a "circular blog hop" where the only beginning is wherever you start. You will know you are at the end of your blog hop when you have arrived back on the blog you started with. (There are only 9 of us, so you should be able to remember where you started)
THE WINNER ... will be chosen by our mystery blog hostess. Who is she ? We want know until after the blog hop. So make sure you leave a comment (with your emial address included in that comment) on EVERY blog to qualify!!
Pamela will contact the winner via email (don't forget to leave your email address with your comment) and post the winner on her blog on Monday 8pm(EST).

Next Blogger to check out is Michelle !

Monday, October 12, 2009

Crafty Secrets Thanksgiving Layout


Good Morning.  Here is a Thanksgiving Layout using the same Crafty Secrets Stamp set I showed you on Saturday.  I love fall and Thanksgiving, so this one was a lot of fun to create.  Hope you like it.  See details below as well as a link to where you can get this stamp set!  Thanks soooo much for taking the time to check out my projects.  Have a great week!


Frame Tutorial
This frame is easy, but requires alot of detailed cutting.  But I think it was worth it.  I use cuticle scissors when doing detailed cutting like this along the curvy area's.  The curve of the cuticle scissors just makes it easy to get around, especially in small spaces.  I simple stamped the image from this set (see photo below) on cardstock, colored and trimmed.  I layered the felt flourish trim around the photo first, then layered my stamped images over that using pop dots.  Stretch those creative muscles and think about how you can combine images from a set to create a frame.  I think you will like the results!

Paper : Crafty Secrets DP (beige), Daisy D DP (green), beige and dark brown cardstock
Ink : VersaFine with Clear Embossing Powder for all images, Palette Burnt Umber to distress edges of DP using eyeshadow applicator.
Other : Velvet Class A' Peel Stickers by Stampendous, Ribbon - unknown.  Corrugated cardboard painted dark brown using acrylic paint.  Cuticle scissors used to cut around images and pop dots to pop up some of the frame.  Deckled scissors by Fiskar.
Colorization : Prismacolor Pencils and OMS with Shimmerz.


Saturday, October 10, 2009

Artist Trading Card / Thanksgiving


Artist Trading Card 2.5" x 3/5"

This Thanksgiving Stamp set from Crafty Secrets had the cutest image and sentiment.  It made a cute little ATC, but could easily have been a card!  I created it for one of the Crafty Secrets Challenges over at Splitcoast Stampers.  

Stamp Set : Thanksgiving Clear Art Stamps - Crafty Secrets
Other : Ranger Crackle Paint
Ink : Brilliance Pearlescent Chocolate (swirlies in the corners)
Palette Burnt Umber (turkey, leaves and sentiment)
Colorization : Prismacolor Pencils and OMS, Shimmerz

You can view all of my ATC's HERE

Tuesday, October 6, 2009

Crafty Secrets Announcement !


I'm soooo excited to share with you that Sandy at Crafty Secrets has selected me to be their Guest DT Member this month!  How cool is that.  I love their Vintage look.  I'm been using their products for a couple of months now and started playing along with the Crafty Secrets Challenges over at SCS and PCP.  Great group of gals running the challenges.  We would love to have you join us !!

Their products are different from a lot of the other stamp companies.  In case you are not familiar with their products let me share a little about them.  They sell not only Clear Stamps, but also Pattern Paper Pads, and other vintage images via their Heartwarming Vintage Collection.  These range from cardstock weight printed images - Paper Scraps, Cotton Scraps, Sticker Scraps.  You have to see them so see how adorable they are.  Some of the Sheets of multiple images are only $1.75.  Excellent prices.  Ships fast as well.  Hurry and get yours ordered so  you can hop over to Splitcoast and play along with their weekly challenges.

You can order online.  Check out their HOME PAGE HERE.
Check out their BLOG HERE.
Check out other projects I have created using their products HERE !


Sandy said she needed someone to demo use of her products on layouts.  So I will be sharing more layouts with you this month!  Don't get stuck thinking that stamps a just for cards.  These little guys are so cute and I had a ball creating this layout using them.  They would be equally adorable on a birthday card or invitation.  How about a mini birthday album??  Too cute!

Supplies:
Stamps Crafty Secrets : Birthday Kids Clear Art Stamps
Paper : Carolee's Creations (polka dots), My Minds' Eye (yellow), Red Cardstock
Ink : Palette
Colorization : Prismacolor with OMS and my new favorite - Shimmerz
Tools : Cuttlebug Embossing Folders
Ribbon : unknown
Chipboard : Technique Tuesday (stars), Prima ("Boy"), and Thickers ("birthday")

Thursday, September 17, 2009

Altered Acrylic Photo Frame

Good Morning and welcome to FireCracker Designs by Pamela's Monthly Blog Hop!

This months theme is "Greetings and Salutations".  All 9 of us will be sharing projects created with this theme in mind. And the best part for you is Pamela will be giving away some awesome blog candy.  But to qualify for the drawing you have to post comments.  She will randomly pick one of our blogs and then randomly pick from all the comments posted on that blog.   So you will want to read ALL the blog hop details below and leave comments on each of the blogs to qualify for the drawing.  Make sure you leave your email address in your comment!

Altered Acrylic Frame
I found this old photo of my Great Grandmother and could not resist creating this altered frame using this set. I couldn't think of a better way for her to "greet me" than by displaying her photo for our family to see.


I really love altering acrylic frames.

#1 - They are inexpensive.  I got this one at Walmart for $1.  So you can spend your $$$ on the perfect embellishements (I highly recommend rubber stamps, hehe).
#2 - I get to decide where and how big the photo window, opening will be.  I like having all the design control!

#3 - They make great gifts because you can add all the goodies/decor to the outside of the frame and the recipient can add the photo easily later by sliding the photo in the back as shown above.

Have I convinced you to create one yet??  Are you seeing a great, unique idea for gift giving this year??

Blog Hop Details ...
The official start time of the FCD Blog Hop is Friday at 8:00am (EST). If you have arrived early, please be patient, as all the links may not be live until 8:00am (EST).
This is a "circular blog hop" where the only beginning is wherever you start. You will know you are at the end of your blog hop when you have arrived back on the blog you started with. (There are only 9 of us, so you should be able to remember where you started)
THE WINNER ... will be chosen by our mystery blog hostess. Who is she ? We want know until after the blog hop. So make sure you leave a comment (with your emial address included in that comment) on EVERY blog to qualify!!
Pamela will contact the winner via email (don't forget to leave your email address with your comment) and post the winner on her blog on Monday 8pm(EST).

You can read on below for more of my project details OR continue on to the next blog !

Michelle will give you the next link to keep you going round in the circle til you get back to the beginning. Hope your not dizzy, hehe.


Project Details ...


Tuesday, September 15, 2009

Cool Beans Gift Card Holder


Ok ... so I'm loving this gift card holder. 
Guess how many people I know who love getting Starbucks gift cards??  Bunches!!  Ok, so I know some of you out there don't like to give gift cards.  You think it's not very "thoughtful" or personal.  I beg to differ!!   I would rather receive a gift card anyday, to my favorite store, where I can pick out the perfect item, that I really want, instead of receiving something that will end up in the next garage sale.  And if I'm going to spend money on a gift I want the same to be true for my recipient.  Besides it's thoughtful to find out where they like to shop!!   You could actually create a few of the actual holders and have them on standby.  Then you could add stamped images, ribbon later when ever an occasion arises.  You know...  for that last minute ... oh crap I forgot ... moment ! 
Never happens to me, hehe!!

Project Details ...
Stamp set : Escape the Daily Grind - FCD
Ink : Brilliance Pearlescent Chocolate
Kraft cardstock
Patterned Paper : Basic Grey
Ribbon : American Craft
Tools : Corner rounder, Scorpal, metal ruler, exacto knife

Cut Kraft cardstock 4" x 8.5".  Score using Scorepal at 2 3/4", 4 1/4", and 5 3/4 from one side.

Fold along score lines as shown below.  Cut opening as shown slightly smaller than 3 1/2" x 1/4" as shown below.  I used a metal ruler and exacto knife to do this.

Use a tape runner or red line double stick tape to secure as shown below.

Gift card will be held securely inside the slot you have created.
Stamp or hand write a message on the inside.


Stamp the outside and add ribbon!

You can view all of my Fun Fold Cards HERE

Related Posts Plugin for WordPress, Blogger...