Showing posts with label Manuf - The Angel Company. Show all posts

Monday, July 25, 2011

Mini Album #5 : Beach Album


Good Morning Paper Crafters.  Today I am sharing a summer album I created a few years back and never shared on this blog.  It was designed using a mini album by The Angel Company.
It's called Pemberly Bay.  It's a matchbook album and REALLY easy to put together. 


This photo is of my daughter.


and a few friends.

The stamp sets I used for the seahorse / seashells / phrases is an old TAC set, but a couple of other stamp sets that work well instead would be GinaK's "Gifts From the Sea" and Layers of Color's "Under The Sea".


And in this photo from left to right : a friend, my daughter and my son.

More friends on these 2 pages.


If you like mini-albums then please join me on Friday for a summer mini album blog hop sponsored by Creative Cuts and More.  I'm sure you will find lots of inspiration for your summer albums!

And if you need a consultant from The Angel Company so you can order your own Pemberly Bay mini album kit ($6.95), then please email me at luv_2_stamp@yahoo.com.  I just happen to know a few of them that you could order online from.

Thanks for stopping by!
Melisa

*******************************************************

You can view more of my Mini-Albums HERE.
You can view more of my Beach / Summer projects HERE.

Saturday, January 1, 2011

Mini Album #3 : Rockin' Roxie

Happy New Year Papercrafters!  I'm sooooo excited about the new year and what it will bring!  First of all a house!  Oh how I can't wait.  Our lease is up in April, so we are starting to work with our realtor.  Oh how I want a bigger studio to work in! 

Today I am sharing a mini-album I created a while back.  I just found out that these little kits are just $3.48 now!  They come in several styles and would be perfect for quickly putting together a few gift albums for relatives!  You can check them all out HERE. 


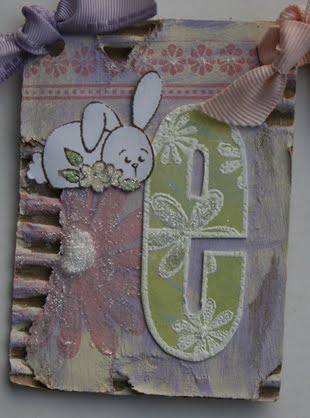
 This particular one is called "Rockin' Roxie".
And I used TAC stamps through out to embellish it.  The word stamps are no longer available.  But you could easily create your own on your computer!  The stars are pretty generic as well, so I'm sure you could substitute these as well.  The large star is hand drawn and then I added white fun flock with my Zig 2-way Glue Pen.  Stars in the background were stamped with Brilliant Moonlight White by Tsukineko.  And those gorgeous red stars were created using Brilliance Red Rocket.


 I embellished the album with basic stamps, circle and stars.
The background on this page was stamped with various circle stamps in Brilliant Moonlight White by Tsukineko. 
On this page I incorporated the star theme by punching the 3 stars in the left upper corner of the photo.  And finally put some of those colored staples to use!


I used "Linear Sentiments on this page.  And you can find that set HERE.


On this page I incorporated the star theme by punching the 3 stars in the left corner of the photo.

This photo reminds me of how my heart would skip a beat when he headed down into one of the "bowls" at the local skateboard park.  We had to make him wear a helmit at home.  Luckily the skate park required it.  He is a brave boy!


This is my boy and this album captures him so well.  He is 23 now.  Wow how time flies.  He was always on the go, into something, a bundle of energy.  We made lots of trips to the ER.  He is more settled now.  And his hobbies are a little less dangerous - Video games, playing his guitar and writing music.  I LOVE this boy!


 More stamped stars in the background.

$3.48 per kit!!!!! 

If you do not have a TAC Consultant, then please check out my friend Barb's Online Store.
HERE

You can check out more of my mini albums HERE.

I have a couple more I will be posting in the future.  I think I will post them once monthly til I get all uploaded.  Thanks so much for stopping by and allowing me to share what I love with you!
Have a blessed day!
Melisa

**************************************************

Making the world more colorful with Layers of Color!

Yesterday was Faith Art Friday at Layers of Color.  Check out the blog HERE!
Layers of Color is proud to be a Spellbinders Preferred Stamp Company and that we all love and use the Grand Calibur??

You can now upload your Layers of Color projects to our Flicker Group HERE, and find tons more LOC inspiration!
Please join us on facebook HERE.

Layers of Color NEW RELEASE blog hop is coming Janurary 17th.  Please join us and check out how you can win FREE Layers of Color stamp set from each designer!


Wednesday, April 7, 2010

Cardboard Art


I really do love taking pieces of cardboard and turning them into little pieces of art that I can give to someone to sit on their desk, or where ever, to bring a little cheer to their life and remind them how very special they are to me.
I created this one for my daughter Nicole's birthday.  Yep, it's a little bright, but if you knew my daughter, you would now this is right up her alley.  And the sentiment is special between us because when she was little, "our song" was, You are my sunshine, my only sunshine, you make me happy, when skies are gray ....  Ok, enough singing, you get the picture.  The stamp set is called Gardenia's, but I think it worked just fine as a sunflower and to be honest I don't even know what a Gardenia looks like, teehee.  Isn't that the great thing about art  ...  you have creative liberties to make it what you want.  Corrugated cardboard is free and easy to work on.  I always start by tearing away some of the surface paper so that some of the ripples show.

Here are a couple more I created last year.  Since I have way more readers on this blog than I did on my TAC blog, I will gradually work in some of my favorite TAC projects I have created on this blog.


You can view more of my Cardboard Art HERE.
You can view more of my Collage / Mixed Media projects HERE.


 Tip / Technique : Using Pumis Gel
Pumis is a sandy/grainy medium found in the artist section at local craft stores.  The brand I use is Golden and it is "coarse pumis".  It's easy to work with and adds great texture to projects.  It's comes a light shade of grey, but you can mix it easily with acrylic paints.  I used pink on these projects.  You just smear it on using a Palatte knife and let it dry.

You can buy these little cardboard easel pieces to attach to the back of your project. I got mine in the picture frame section of one of the local craft stores, maybe Michaels.
So what do you think??  Hopefully you will be inspired to share a cheerful project with someone special in your life.

As alway, thanks for stopping by, letting me ramble and admiring what I love to do!

Sunday, March 28, 2010

Hear comes Peter Cottentail !

Easter is right around the corner, so I thought I had better get some cards done and in the mail.  


Tip : Stamping on Ribbon
Well not much of an explanation needed.  But my tip is to use a juicy pigment ink.  I used Brilliance Pearlescent Chocolate on the pink ribbon above.  I love the Brilliance line of inks for a pigment ink.  I also use VersaMagic.


Here is an Easter tin I made last year.


Tip : Altering a vegtable can
So inexpensive to make.  It's actually a vegtable can.  Squeeze the sides together slightly to make it longer at the top.  I sprayed it with this yummy brown texture spray paint.  Then smeared on a little pink acrylic paint.  I used my Crop-a-dile to punch holes in the side.  I painted wooden beads and threaded them on some brown craft wire.  I twisted the wire down both sides of the beads and attached through the holes on the sides.   It would be even cuter if you added some wooden balls at the bottom to create feet!
 
Here is an Easter Banner I made last year and posted over on my TAC blog.


Tip : Cardboard Art
The entire project is acrylic paints, stamps, punches and ink.  I used cardboard, tore off parts of the front to reveal the riples. I painted the backgrounds of each panel with layers of acrylic paints. Messy and fun!!
The Easter set I used on the tin and the banner  is No Bunny Like You by TAC.  All the florals are various TAC sets as well.  The font is Big Timber by Technique Tuesday.  This has always been one of my favorite TT sets because it's open.  So you can stamp it on any type of pattered paper and you have a perfect match for a layout.  Or stamp a pattern and then the letter over that. 
I hope this gets you in the mood to create something fun for Easter!

You can view more of my Cardboard Art HERE.

You can view more of my Collage / Mixed Media projects HERE.

Saturday, March 27, 2010

GinaK Designs - "Lovely Shelf"


Good Morning.  Today I'm sharing with you a wonderful stamp set called "Lovely Shelf". (once you get to the link, scroll down to check this particular set out)  I designed this one using the colors assigned at the
Copic colors I chose:
purple - BV02, BV04, BV08
green - G20, YG03, YG91
brown - E55, E35

The sentiments are really versatile.  You can fill in "aunt", "mother", etc.  There are also other sentiments, "Thanks for a lovely gift", "What lovely news", etc.  You can get this one from GinaK Design.  The designer is Nina Brackett and I really love some of her sets.  You can check out all of her stamp sets, digital paper lines, and Perfect Patterns line HERE.
Nina's Blog


Prefer digital images???  Check out Nina's digital stamp line at Squigglefly
I created this one for this week's color challenge over at StampTV.


This one is not my usual card.  I'm thinking I would have liked it better if I had a white background with black polka dots.  No time to change it now. 

Stamps :  butterfly - The Angel Company "Wishing Happiness"
sentiment - GK Designs
Patterned Paper - 7 Gypsies


Thanks for stopping by!

Monday, March 15, 2010

Teacup Card


Good Morning!  Today I am sharing a tea themed card with you!

Product Review
I have to do a product review with this one.  I don't usually state negative opinions, but I have to tell you, I tried the Fiskars circular punch on this one and did not like it.  Of course part of the problem was my own.  I accidently threw away the cutting template.  But I had another sewing template that guides you for cutting 4" and 6" circles (the sizes you are suppossed to start with)  and it didn't work.  I could not get it to punch through cardstock.  I'm wondering if the circle you start with is a different size and the final product is 4" or 6".  That may be my problem.  So if anyone has one of the cutting templates that come with it, I would appreciate a measurement on the diameter.  I really do want to like this punch, teehee.

You can view all of my Tea / Teacup related projects HERE

*******************************************************

Project Details

Stamp Set : The Angel Company
Border and Circular punch : Fiskars
Deckle sissors (my favorite)
Flowers - Bo-Bunny
DP - My Mind's Eye

Tuesday, March 9, 2010

Scor-Pal Tutorial


I wanted to try a creative use for my scor-pal, so I created scored lines diagonally and then sewed on seed beads at the intersection. What a fun tool!
Stamp set : Wee Ones from The Angel Company!

Scor-pal Tutorial
Today I decided I would focus on showing you how to create a criss-cross pattern using your Scor-pal and then re-post a couple of projects. Start with a square piece of cardstock (mine is 8"x8"). Lay your cardstock on your Scor-pal with each of two corners along the 6" line as shown below.


Now score lines 1/2" apart. Turn the cardstock so that the other 2 corners line up on the 6" line and score lines at 1/2" intervals. The result will be a criss-cross pattern on your 8" x 8" piece of cardstock. You can now cut this into smaller squares to use as you like.

On this sample I layered 3 different color inks to create this mosaic look. I just brusted the ink pads over the panel and then used a brayer to help blend the colors.


This one is an example of the same technique but the pattern is a grid instead of a criss-cross.

Also consider using your Scor-pal to create a simple border.


Hope this simple tutorial inspires you to use your Scor-pal for more than just creating a simple fold for your cards !

Friday, February 12, 2010

Altered Metal Tin


Tip / Technique : Stamping on Tissue Paper

I had so much fun making this!  I purchased one of those $1 tims from Michaels that already had the black and off white florish design you see in the background.  Did you know you can stamp and emboss on tissue paper.  Thought I'd give it a try, and it worked!!!  I painted a light layer of gesso over the top of the tin.  I stamped the heart, "love", birds, and butterly on tissue paper with pigment ink, and embossed.  I actually stamped the "love" first and then mask it off, stamped the heard and "forever" on the same peice of tissue.  I cut the tissue paper around the images but not close, because I wanted to tear it.  I painted water around the endges so that the tissue would tear and leave a distressed edge.  I used the gesso to adhere the tissue images and repeated the same steps with the birds and butterfly.  I stamped around the edges with a swirl and red pigment ink.  The other qoutes and cupid are rub-ons and the glittery heart is a brad I cut the prongs off of!
Stamps : The Angel Company
I think the rub-ons are Basic Grey, but the package is long gone, these are really old.

thanks for stopping by !
Melisa

You can view all of my VALENTINE projects HERE.


You can view all of my altered projects HERE


Sunday, February 1, 2009

Valentine Treat Box


Valentine Candy Box
I got this adorable candy box in the wedding section at Walmart. So this mini gift was so easy to put together. I used 2 stamps from my "Forever" set to create the tag. I stamped the frame twice. Once in Brilliance Rocket Red and once in VersaFine Onyx Black. I embossed both with Tsukinek Clear Embossing Powder. I trimmed the florishes off the edge of the red frame and then glued on top of the black version so that the black flourishes now extend out. I stamped "Be Mine" sentiment in the center and embossed as well. I glued this onto the box and then added my cupid die. So easy!

Supplies List
Stamp Set : Forever
Ink : Brilliance Rocket Red, VersaFine Onyx Black
Other : Tsukinek Clear Embossing Powder
Candy box - Walmart, Ribbon - unknown, Cupid Die - Quickutz

You can view all of my VALENTINE projects HERE.

Sunday, January 25, 2009

Valentine Coaster Gift Box


This one is pretty easy to put together.  You need 5 coasters.  Run red and black cardstock through the Cuttlebug.   Adhere coasters to the back of the panels and then trim around edges.  Create a hole punch guide to use so that all of your holes are equal on each coaster and then punch holes.  Connect at each corner by lacing ribbon,  using a criss cross pattern on the front.  This creates 2 horizontal lines lines on the inside.  This is important becuase you will set the 5th coaster inside the box, resting on the bottom line of ribbon in each corner.  See corner below.  This gives the bottom some support. 


 Use Aleene's Tacky glue to adhere to the ribbon corners and then along the bottom around the edges, adhering it to the sides.

Now just use your stamps to embellish the front!


This one is pretty easy to create.  I used dies to create my own little felt birds, and the polka dot heart.  I used a heart punch for bird wings.  The background is a TAC stamp.  I hand typed the sentiment.

Thanks for stopping by!

You can view all of my VALENTINE projects HERE.
Related Posts Plugin for WordPress, Blogger...