Sunday, November 11, 2012

Denami "Thoughtful Thank You" Blog Hop


Good morning card makers.  Today I'm sharing several baby projects with you.  The first is a baby thank you card designed for the Denami "Thoughtful Thank You" Blog Hop.  You will have a chance to win a store gift certificate so I hope you will join us!  See all the details below!


I created my baby thank you card using "Giraffe" and "Teeny Heart Background".  I think this little guy is just perfect for a boy or girl card!  Patterned paper, ribbon, and sticker "thank you" are all from my stash.  I also used deckled scissors (Fiskars), Oval and Scalloped Oval dies (Spellbinders), and scalloped border punch (Fiskars).


I created a baby congrats card and gift bag as well.


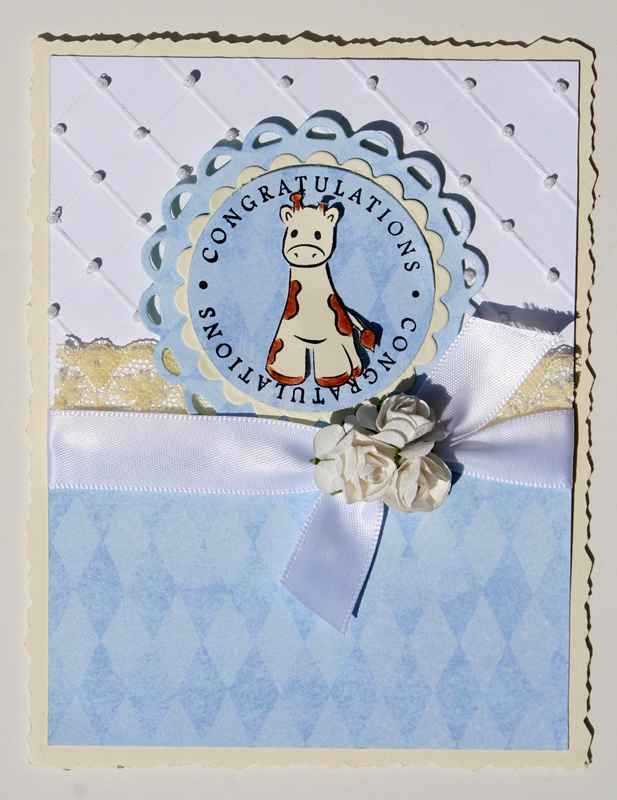
I used "Giraffe" and "Congratulations Circle" for this set.


 I created the diamond background on the top panel using my Score-Pal and stitched on little white seed beads.


This baby congrats was designed using "Polka Dot Elephant" and "Congratulations Circle".

Do you remember the little thanksgiving chick card I posted a while back HERE???  Well I just got more of those little cutie patooties!!  Denami has a huge collection of these cuties for lots of different occasions.  So if you are a chick lover, check them out HERE.  I now have them for Christmas, Valentine's Day and Easter as well!!  I'm lovin' the Telephone Chickies and the "I'm glad to call you my friend" sentiment

Hope you are inspired to do some stamping and card making this week!
hugs, Melisa


************************************************************************

Blog Hop Details


If you are participating in the hop and joined me from Jennifer Harris's blog ... then your in the right spot.  If you get lost along the way .... you can always hop over the the Denami blog for a full list of blog participates.


When: The blog hop starts on November 11th at 6 AM, PST. However, you have until November 12, 2012, 11:59 pm PST, to leave comments on all the blogs (to be eligible for a prize).


Why: To be inspired by fun DeNami Design creations and also the chance to win mini shopping sprees on the DeNami Design website!


Prizes: We are giving away THREE $20 gift certificates to our website! We'll be giving away one gift certificate to a random participant (DT members not eligible) and then we'll also be giving away TWO gift certificates to TWO people who comment along the hop!


Your next stop in the blog hop is

Lynda Lindley


Saturday, November 10, 2012

Fall Banner / Textured Leaf Tutorial


Hello paper crafters.   Today I want to share a fall banner I designed using  Pink Persimmon's "Big Banner with Rosettes" and "ATC Sized Background - Fairy Tale".    I'm also sharing a tutorial on how I created the leaf embellishments.  This little banner could easily be turned into a "Give Thanks" banner as well.  And .... for a casual dinner table, I think the leaf / button embellishments I made could be converted into a napkin ring holder.  


This "Big Banner" set is so awesome!!  With this set you could create a banner for every holiday.  I didn't use the rosettes this time, so you have to hop over and check them out.


I love the texture and variation of color I was able to create on my die cut leaves with an embossing folder and acrylic paint.


Thanks so much for stopping by!!
If you create a banner using "Big Banner", I'd love to see your idea's.  I will need some inspiration for future holidays!
hugs,  Melisa

Check out Pink Persimmon stamps HERE.

**********************************************************

Project Details

Stamps : "Big Banner with Rosettes" and "ATC Sized Background Fairy Tale" Pink Persimmon
Check out Pink Persimmon stamps HERE.
Patterned Paper : Scenic Route Company - banner (old) and The Paper Studio - small leaves (Hobby Lobby)
Ink : Tsukineko "Pearlescent Chocolate"
Chipboard letters : The Paper Studio (Hobby Lobby)
Wooden Buttons : Favorite Findings (one of the local craft stores)
Twine : Papertrey Ink     Ribbon : Hug Snug seam binding
Acrylic Paint :  Various Americana colors
Spray Ink : Adirondack "Sunset Orange"
Die cut leaves : large - Creative Cuts and More, small - Provo Craft (old)
Embossing Folder : Cuttlebug "Textile Texture"
File set : Basic Grey (Hobby Lobby)

Stamp flag image on patterned paper and cream cardstock.  Trim around scallops of cream flags.  Trim around stitch line of patterned paper flags and adhere to cream flags.  Stamp script image on cream cardstock.  Adhere front of chipboard fonts to back of script image.  Trim around edges with exacto-knife.  File around edges with file set tools.  Ink edges and adhere to each banner.  Emboss leaf die cuts (I started with 2 orange maple and 3 brown oak).  


The oak leaf was a dark brown.  Create more depth by layering on acrylic paint with your fingers.  I used a dark orange color here.


Add more paint. I used a cream on this one.


Here I lightly sprayed with Sunset Orange spray ink and then used a paper towel to soak some of it up.  It changed the color of the cream paint to a yellowish orange color.  


I went back over with a dark brown here and there and then ink the edges brown.  Just keep layering until you get lots of different shades.

The maple leaf was a bright orange.  I started layering paint again beginning with a dark brown and then tan. Sprayed with the Sunset Orange and blotted off with paper towel.  Then added more paint and inked the edges.

Cut smaller leaves from patterned paper and ink edges.  Paint wooden buttons with cream paint and add twine bows.  Layer leaves and buttons.  Punch holes in each end of each flag.  Thread seam binding through.  Adhere leaf embellishments.

Thursday, November 1, 2012

Family Tree Scrapbook Layout


Hello Scrapbookers!  I'm excited to share that I'm the guest designer this month at "Scrap It Girl" . Scrap It Girl post a challenge on the first day of the month and you have til the last day of the month to link your projects.  This month's theme is "trees".  She offers prizes as well, so hop over and check out this month's challenge HERE.

I designed my tree using wire.  I was inspired by a 3-D memory tree I had purchased from Hallmark years ago.  I did a search ... and you can still buy it!!  HERE


Mine was broken in the move to Houston : ( .  It's patiently sitting in the garage ... I keep hoping DH can fix it.


I did invest a lot of time in this one.  But I love how it turned out and how it is unique from my other layouts.  I don't want all my pages to "look the same", so I continue to try and use unique products to mix it up.


I think the brown wire is from Hobby Lobby??  or Michaels ?? sorry, it's hard to remember.  Basically you just keep twisting wire and secure the limbs to the branches with wire as well.  The little hangers were made from wire as well.  I used an old stencil to create the paper pieced flourish elements in the corners and under the title.  The title was created from chipboard letters.

So here's my problem ... I don't think I have it in me to create another one ... so which child's album is this one going in???  Probably my daughter.  She appreciates my art a little more than he does.   My son will get a much simpler version, teehee.


Thanks so much for letting me share!
Melisa

You can view all of my Scrapbook Layouts HERE.
You can view my Mini Albums HERE.

Tuesday, October 30, 2012

Crafty Secrets Born to Fly Birthday


Good morning stampers.  Today I'm sharing a card I created using "Born to Fly" by Crafty Secrets.  Isn't she a cutie patootie with the little the little bird nest on her head.  So many cute little elements in this set including the little tickets, flag, and butterflies.  And this set is on sale for 15.50 (reg 24.99).  


Crafty Secrets is transitioning into digital products so all their clear art stamps are on sale!  Check out what's left HERE.  They have lots of fun digital sets listed at their Etsy store HERE.  Their design team is creating some really cool inspiration using the new digital line.  

thanks for stopping by!
Melisa

*******************************************************

Project Details

Patterned Paper :  Authentique “Essentials Collection” 6 x 6 paper pad
Flower : The Paper Studio
Gathered tuelle and pom pom trim - Joann’s
Glitter Glue : Stickles
Markers : Copic

Trim patterned paper and adhere to card front.  Adhere trim and flower.  Stamp sentiment in bottom corner.  Stamp scalloped trim, fairy girl, wand, bird, small and large butterflies, and tickets.  Color with markers, trim and adhere to card front.  Stamp banner flags, color, trim and string to create banner.  Adhere to card front.  

*******************************************************

Challenges

Paperplay (thur) - butterflies or bee's
Sugar Creek Hollow (sat) - texting vintage style ( grey patterned paper is words)
Totally Gorjuss (sat) - thing with wings
By the Cute and Girly (monthly) - birthday 


Sunday, October 28, 2012

Family is ...


Hello scrapbookers.  Today I'm sharing a layout created using more of my stash and I'm linking it to the "family" challenge over at The Studio Challenge Blog .  One of the things I tried to drill into my little ones heads when they were growing up was that we will face enough obstacles out in the world.  We will meet un-kind people and people who may hurt or feelings .... and that is why we shouldn't have that in our home.  It should be a place where we feel secure and loved unconditionally.  And I wondered if this was even getting through to them at times, with all the disagreements they had.  But now .... as young adults I'm seeing that they are better friends, support one another and give each other advice during difficult times ... just maybe it did make a difference.  : )

The Studio Challenge Blog post their challenges twice a month but you have til the end of the month to complete the projects.  The second post this month was a sketch challenge HERE.  It's a little different than a lot of challenge blogs.  Instead of link to the actual challenge post, the link system is over on the side bar.  Very talented DT with lots of inspiration over there!!

My most used tool ...
Besides my paper trimmer, my most used took is definitely my deckled scissors.  I LOVE them and think they finish off edges so pretty.  And they are the star on this layout.  So I had the layout pretty much finished, but it just needed something else.  It was mounted on red cardstock with straight edges all the way around.  So I decided creating a frame with the deckled scissors would finish it off nicely.  I trimmed 12 x 12 strips of the red cardstock down with the deckled scissors, ink the edges and then adhered them around the outside edge of the layout.  Then I cut the corners from red cardstock.

What is your most used tool???

Have a great day!!
Melisa

You can check out all my Scrapbook Layouts HERE.
You can view my Mini-Albums HERE.

Friday, October 26, 2012

Background Tutorial !

2.5" x 3.5" Artist Trading Card

Hello paper crafters!  Today I am sharing an Artist Trading Card with a background technique that can be used for your card making as well.  I designed this one using Pink Persimmon's "Vintage Cupcake" and "ATC Background Springtime".

Check out Pink Persimmon stamps HERE.

Hope you are inspired to try this technique!
Melisa

You can check out all my background tutorials HERE.
You can check out all my ATC's HERE.
You can check out all my Pink Persimmon projects HERE.

*****************************************************

Project Details

Stamps : Pink Persimmon "Vintage Cupcake" and "ATC Background Springtime"
Check out Pink Persimmon stamps HERE.
Patterned Paper :  Authentique "Essentials Collection" 6 x 6 paper pad (blue)
Ink : VersaMark Watermark Ink
My Mind's Eye Miss Carolina 6 x 6 paper pad (pink)
Butterfly Punch : Martha Stewart
Floral Punch : EK Success
Chalk : Pebbles Inc.
Glue : Aleene's Tacky Glue
Glitter : Recollections Extra Fine Glitter


Draw 2.5" x 3.5" rectangle on the back of patterned paper.


Trim inside the lines with deckled scissor, and ink edges.


Trim slightly smaller piece of white cardstock.  Stamp background image with VersaMark Watermark Ink.  Let it dry for a few minutes.  Rub chalk over background.  Ink edges and adhere to trimmed pattern paper.  I love the softness of the chalks.


Stamp cupcake once on white cardstock and once on patterned paper.  Color cupcake brown and trim.  Trim cupcake liner, ink edges and adhere to cupcake stamped on cardstock.   Apply thick white glue to icing.  If it flows over lines, use a tooth pick to remove.  Sprinkle with glitter.  Punch flowers x 2,  layer, and ink edges.  Punch butterflies, color butterfly body,  then ink edges.  After icing has dried, embellish with punched flower. Add pearl to flower center.  Adhere to background.  Type word's, cut, ink edges, doodle around edges, and adhere to ATC.


See ya next month with another ATC / Background tutorial!


Thursday, October 25, 2012

We are family ....


My children were the typical siblings ... they didn't always get along.  God could not have produced 2 children who are so different.  I wonder how it is that I birthed these 2 sometimes, because they are so different, but each special in their own unique ways.  

I have a ton of "page kits" I put together years ago where I matched up paper / embellishments with photo's.  So I hate that I will be posting old products a lot, but I'm happy I'm using my stash!!  But I will try and share other tips or techniques that may inspire you.

Creating a paper frame :
I created the frame by cutting strips of the striped paper and mitering the ends.  I applied blue acrylic paint around the edges and randomly on top of the strips give it a worn look. I cut a second set from a piece of patterned paper that had circles on it (you can see it peeking around the edges of the striped frame), and adhered the 2 together.  I cut a red a red piece of cardstock into a 6 5/8" x 7 3/4" rectangle, adhered the patterned paper layers / frame to it and then used an exacto knife and metal ruler to cut out the opening along the inside edge of the patterned paper frame, creating an opening for the photo.  Next I cut another piece of red cardstock to 7 1/8" x 8 3/8" and distressed the edges with blue paint.  Lastly, I layered the base / photo / frame, popping the frame up off the base, creating a unique element for this page.   

Creating your own paper embellishments :
Consider creating your own paper embellishments to save money.  Look for patterned paper sets with different design elements that you can cut up and layer.  On this layout I cut flower elements from other pieces of patterned paper and created my 3-D flowers .  Then I finished off the layout with some rub-ons.

Hope you are inspired to look at your scrapbooking products a little differently and to create your own frame.  If you do ... I would love to see it.  Just stop back by and leave me a comment and link and I will check yours out.

Happy Scrapping!
Melisa

You can check out all my Scrapbook Layouts HERE.
You can view my Scrapbook Mini-Albums HERE.


********************************************************************

Challenges

Challenge Me Happy Scrapbook Layout Challenge Blog


My layout has blue, green, yellow, orange, and brown in it.

Wednesday, October 24, 2012

Sweet n' Sassy - "Autumn Bounty"


Good Morning!  Today I'm sharing a CAS card.  I used "Autumn Beauty" by Sweet n' Sassy Stamps.

Tomorrow I'm sharing a background tutorial, so I hope you will join me.

Have a great day!
Melisa

You can check out all my Fall / Thanksgiving projects HERE.

***************************************************

Project Details

Stamps : Sweet 'n Sassy "Autumn Bounty"
Copic Markers : YR20, YR15, E57 (pumpkins)  YR15, E97, E57 (flower) Y00, Y15, E43 (sunflowers)  YG61, G24, G99 (leaves)  E40, E41 (vase)  E23, E57 (ribbon)

Stamp floral image on card front and on Eclipse Masking Tape.  Trim image along left side of image on masking tape and cover image on card front.  Stamp pumpkin image then remove maskig tape.  Color with markers.  Stamp sentiment.  Embellish with ribbon.

****************************************************

Challenges

Kaboodle (mon) - anything fall
Love to Create (mon) - pumpkins
Hand Stamped Sentiments (tues) - photo inspiration


Craft Us Crazy (thur)- fall into the season


Tuesday, October 23, 2012

The Stamps of Life - "Tree's 2 Build"


Good afternoon stampers!  Hope your day is going well.  I wanted to share another project today.  I love this set by The Stamps of Life "Tree's 2 Build" and it was easy to whip up a quick card for a couple more challenges today.  Hope you get a chance to be creative today as well!!

hugs,
Melisa


*******************************************************

Project Details

Stamps : The Stamps of Life “Tree’s 2 Build”
Ink : Stampin’ Up “Regal Rose“, Versa Magic “Tea Leaves”
Patterned Paper : My Mind’s Eye Miss Caroline 6 x 6 paper pad
Border Punch : Fiskars
Ribbon : Offray

Stamp tree truck in black ink on card front.  Stamp leaves in green ink, doodle around edges of each leaf, trim and adhere around tree.  Paper piece small birds.  Create bodies from patterned larger wings stamped in rose ink.  Create small wings from patterned leaves stamped in green ink.  Cut patterned paper strip and tear along 1 edge.  Add punched border along bottom edge.  Adhere to card front and embellish with ribbon.  Stamp sentiment.

**********************************************************

Challenges
Stampalot (monthly) - punches (border punch)
Order of the Opus Gluei (sun) - use leaves on your project
The Crafty Pad (sun) - Use an animal
CASology (tues) - wild (the birds are wild)
Crafty Creations (wed) - Get Well

Pink Persimmon Style Girl Layout


Hello paper crafters!  Today I am sharing a 12 x 12 layout I designed using Pink Persimmon's new release stamp set "Style Girl"!  I really have been trying to use up my old scrapbook supplies, but I made a trip to my local scrapbook store recently (Archiver's), and couldn't resist some of the new My Mind's Eye.  The Sweetest Thing line is truely sweet!!


I used some old photo's of an aunt (my mom's sister) for this layout. 


Growing up I thought she was so cool!   She didn't have kids of her own, so my brothers and I were very special to her.  She was always laughing and joking with us.  A sweet and loving women who died way to young.  I think if she had lived to her sixties she would have still had a youthful and joyous approach to life.  It's just who she was.


I paper pieced my Style Girl images.  Stamp the image on patterned paper and on white cardstock.  Color as shown with markers.  


Trim as shown.  Hard to see in the photo, but along the left side I trimmed around the hand bag by cutting into the dress to leave a little white cardstock to tuck behind the patterned paper skirt.  You can get away with not cutting around the handbag like that, but I had to trim the white out above it and around the hand on the hip, so it was just easier to cut out if I cut the handbag a well.  Layer the skirt and then adhere the white side of the hand bag to the back, and the thumb on top of the patterned paper skirt.  Adhere the pocket.  Adhere the top of the dress.  Color collar / bow and buttons.  The second girl was paper pieced the same way.  

I hope you will stop back by on Thursday for a background tutorial

Thanks so much for stopping by and have a blessed day!!
Melisa

Check out Pink Persimmon stamps HERE.

You can check out all my Scrapbook Layouts HERE
You can view my Mini-Albums HERE.
You can check out all my Pink Persimmon projects HERE.


****************************************

Project Details

Stamps : "Style Girl" Pink Persimmon
Check out Pink Persimmon stamps HERE.
Patterned Paper and Cardstock Embellishments : My Mind's Eye "The Sweetest Thing" by Jen Allyson
I used a sheet from the 6 x 6 paper pad for the doily and dresses
Die : "French Pastry Doily" by Cheery Lynn Designs
Tag : Donna Downey
buttons and lace : unknown
Markers : Copics E000 / E00 / R00 (skin), RV11 / R85 (pinks), E23 / 25 (browns)

***************************************

Challenges

My Mind's Eye - Use stamping with your My Mind's Eye products
The Paper Girls Challenge is a photo inspiration.  I used colors in the photo on my layout.

Catered Crop (sun) - use circles ( I have lots of circles in my doily, buttons, and paper embellishments )
deadline Oct 27th 8pm
Catered Crop


Red Carpet Studio (sun) - is looking for a Scrapbook Layout with polka dots, circles or a ring (I have polka dots on the paper pieced dress and some of the paper emblishments as well as circular elements)
deadline Oct 27th 11pm
Cupcake Craft Challenge (mon) - paper piecing
Make it Monday - anything goes every week
Ink Impressions (wed) - anything but a card
Ladybug Crafts (wed) - favorite embellishment (my favorite embellishment is to create my own using my stamps and my second choice is lace / trim )
Let's Craft and Create (wed) - add dimension
deadline Oct 30th 6pm CST (they are in the UK)
Word Art Wednesday - "Every good gift and perfect gift is from above, and comes down from the Father of lights" James 1:17 ( My family is the greatest gift my heavenly Father could have ever given me.  I'm hoping He will bless us with some additions so I can be a grandma someday.  That would be one of the biggest blessings of all!!)
Oozak's (monthly) - die cuts (I used my doily die)


Friday, October 19, 2012

Hero Arts Stamps - "Three Artistic Butterflies"


Good morning card makers!  I'm crazy about butterfly images and as soon as I seen the Hero Arts "3 Artistic Butterflies", I had to have them.  So pretty!  I also used their "Cling Dots" .  And the best part is that I got them at local craft stores with my 40% off coupons.   I got the blue floral trim from Joann's.  They had it in several different colors.

That's it for today!
Hope you have a great weekend!
Melisa

*******************************************************

Challenges

Rogue Redhead - dots
Cupcake Craft Challenge - 2 is company
A Gem of a Challenge - flowers
10 Minute Craft Dash - color challenge (7 minutes)


********************************************************

Project Details

All Stamps : Hero Arts
Patterned Paper : Basic Grey  6 x 6
“Basic’s White” paper pad
Ink :  Palette Orangerie, Cote D’ Azure,  and Claret
Trim : Joann’s Crafts
Deckled Scissors : Fiskar

Stamp polka dot background image.  Trim patterned paper 3 ¼” x 4 ½” and stamp   butterflies / sentiment.  Adhere trim.  Adhere  panel to orange cardstock and trim   around edges with deckled scissors.

Thursday, October 18, 2012

Creating Clean and Simple cards using Eclipse Masking Tape


Hello card makers!  Today I'm sharing some clean and simple cards designed using "Just Bee-Cuz" and "Background Soup" by Red Rubber Designs.  I used my Eclipse masking tape (the rolls at this link are shorter than mine).  It may seem like a lot of work because you have to stamp the main image once on the card front and then again on the masking tape, then cut out your masking image.  But you can use the masking image multiple times.  After the ink for the main image is dry, cover it with the mask image.  Then stamp you background images.   I used torn pieces of masking tape to mask off area's that I didn't want the background image.  I hope that makes sense.  I'm realizing now that it would have been much easier to take step by step photo's.

Thanks for stopping by!
Melisa

****************************************

Challenges

Sentimental Sunday's - Black and white plus one other color
Charisma Cards - clean and simple
Simply Less is More - 1 layer / wings (card #1)
Paper Crafting Journey - add some bling
Do You Stack Up - vintage

****************************************


Project Details 

Stamps Red Rubber Designs 
Ink : Tsukineko VersaMagic Purple Hydrangea
Eclipse Masking Tape
Decorative tape : Heidi Swapp


Monday, October 15, 2012

New Mixed Media Class by Stephanie Ackerman!!

I just signed up to take Stephanie's class and wanted to spread the word.  This is one of the projects we will be making in her online class.  Check out all the details HERE.
IMG_3598

Class fee is only $25.  She also has a doodling class HERE.

Happy Monday!
Melisa

Sunday, October 14, 2012

You + Me = Love


Hello paper crafters!  Today I'm sharing a layout designed with a photo of my in-laws, Chris and Fred Waldorf.  Married 48 years!  You don't hear that very often these days.  2 very special people with hearts that overflow with love, kindness, and the spirit of giving.  They are a blessing to all of us!


*************************************************************

Project Details

Patterned Paper : "Happy" from "The Good Life" line by Fancy Pants
Stamps : Hero Arts "Friendly Flags", 7 Gypsies "You + Me = Love", Gina K. Designs "Lovely Labels 2", Hampton Art (love heart), Technique Tuesday (script heart)
Dies : Cheery Lynn Designs (Nautical Wheeler doily)
Punch : Marvy Uchida (small butterfly)
Paper / flower embellishments : Dear Lizzy "Neapolitan" Emphemera Flowers
Smaller doily's and white butterflies : Martha Stewart
buttons : Jenni Bowlin Studio Vintage Style Buttons
************************************************************

Challenges

Scrappin' Happy - Use a one word title - "Love"
Scrap Fit - bows or buttons
Bearly Mine - pearls and swirls  (I have a swirly pearl embellishment extending from the top of the "you + me = love" image and one along the bottom under the love and butterfly, but I realized it's diffictult to see)
Top Tip Tuesday - things with wings
Word Art Wednesday - "kindness"
Let's Craft and Create - borders (lace border below photo)
Simon Says - dies or punches (doily die and small butterfly punch)
The Paper Shelter - love beats all
Fairytale - use a photo

*********************************************************


And here is another layout with a photo of my daughter Nicole and her cousin Adrienne.  They were at the end of a tunnel slide.  I used lots of old chipboard elements and buttons on this one.  And I"m linking it to the October challenge over at "Scrap It Girl".  She wanted us to use 12 or more buttons.  If you need challenge inspiration to get some of your photo's scrapped ... then you can check out my Scrapbook Challenge Blog List HERE.


You can check out all my Scrapbook Layouts HERE


Denami Challenge Card


A while back I won a store credit from Denami from Stampin' Sisters in Christ.  I fell in love with the little chick images they carry.   They have them for lots of different occasions.  This set is called "Pilgrim Chickies".   You can check out the sentiment HERE.  Aren't they cute!!  I got a Christmas set as well.  I designed this one for this month's Denami Challenge.  


I was inspired by this sketch


over at Try Stampin on Tues.  Unfortunately, I didn't update my list this week so this one is closed already.   The little leaves I used are the negative spaces of one of my Martha Stewart border punches.  The pattern paper is really old from my stash.

I hope you have a great week!
Melisa

********************************************************

Challenges

Demami : color challenge
CASology : leaf
Use it Tuesday : All about fall (patterned paper is old from my stash)
PaperPlay : simply cute
Diva's by Design : anything goes


Related Posts Plugin for WordPress, Blogger...