Showing posts with label Theme - Baby. Show all posts

Wednesday, June 5, 2013

Bundle of Joy Layout for The Cutting Cafe


Good Morning friends.  Today I am sharing a layout designed using digital stamps / digital cut files by The Cutting Cafe.  Babies are the theme this week so you can hop over to the 
TCC Blog later today for more inspiration.  


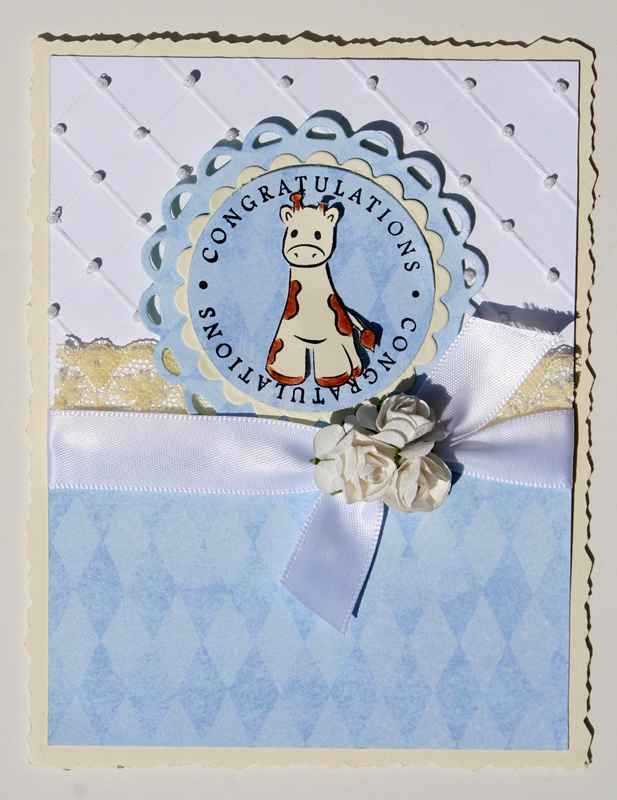
The main focus of the assignment was to use one of the TCC baby bottle shaped cards / treat boxes or the diaper shaped card.  I used the baby bottle shape plus digital stamp images from "All About Babies" to create paper embellishments for my layout.  I also used a couple of dies by Cottage Cuts (Baby Buttons Mini and Diaper Pins Mini ) on the banner.

You can check out the digital files here :


I used the PDF files for this project to create my paper piecing's.  Several images come on 1 PDF page, but I only needed to use a single image on a page.  I followed Regina's instructions found HERE.  Scroll down til you see the section for printing just one image.  My printer settings also allow me to re-size and image as well.  The only images I re-sized are the stars on each end of the banner (60%) and the words miracle / baby boy (75%).  After I click the printer setting on the PDF page my printer box comes up.  My printer gives me the option to change settings.  For my printer I went to "properties", then "advanced", then "page layout".  This is where I am able to reduce the size it will print.  

I always print the image as a draft first.  I cut my patterned paper to fit over the image and secure it with some light tack tape.  I switch the setting to print a better quality and print.  I repeat the process for each patterned paper I need for the particular image I'm paper piecing.   For example : I printed the boat on white cardstock, blue, and yellow patterned paper.  I trimmed out the outline of the entire image from the white so I would have a base to adhere the other section to.  I trimmed other pieces and adhere to the base.  I used pop dots for the sails and star at the top.  

Hope you are having a fabulous week so far!!
Melisa

******************************************************************

CHALLENGES

Frosted Designs - punches (scalloped border)
Scrap It Girl - dies (photo mat, buttons and small diaper pin on banner)
Created With Love - Anything Goes
Paper Playtime - use at least 2 ribbon / fibers (banner and across the layout)
The Crazy Challenge - Use sentiments (sentiments were printed on baby bottle and on banner flags)


Wednesday, May 8, 2013

Baby Shower Gift Set and Banner


Hello friends.  I know it is really such a little thing in life, but I'm a little sad because our Neighborhood Association says I have to get rid of my bird bath and possible my bird feeder (gotta give them a call about that one, not sure if it's the bird feeder or the bird feeder stand they have a problem with) in my front yard.  Both are partially hidden behind the shrubs just outside my studio window and I love seeing my little bird friends stop by to visit.  : (   What's the world coming to if you can't have a bird feeder in your front yard!  teehee.   

Has anyone been watching The Voice or Survivor???  Who are your favorites.  I don't watch a lot of tv but I do enjoy the talent oriented shows.  And yes it does take a lot of talent to be on Survivor, teehee.  I'm really upset Malcolm got voted off.  And I honestly love everyone who is left except Sherry.  

How do you even pick a winner for The Voice??   Soooooo many talented singers.  I have to say I just LOVE geek Michelle and I did take time to vote for her this week.  So glad Usher slowed her down a little and showcased that she can sing well!  I'm pulling for 16 yr old Danielle on Blake's team.  I'm having a problem picking a fav on Adam's team.  I think Amber and Judith are the best.  AND WOW!!! Shakira has the BEST team in my opinion!!   I'd have to go with Sasha or Chris if I had to choose.  Will see who stays tonight!!


Well I guess I should share a little about tonight's post, teehee!  I made this set last year and hadn't got around to posting it yet.  I LOVE Pink Persimmon's "Baby Clothesline" and "Baby Greetings" so I decided to create a little shower set.

Check out all Pink Persimmons stamp images HERE.


I also LOVE their banner sets.   They make creating your own banner really easy!


Here are a few other projects I have created using "Baby Clothesline"


Have a great night!!  I'm off to get ready for bed.  I have to be up at 4am, grrrr!  But so very thankful to have a job!
Melisa


***************************************************

Project Details

Card

Stamps : Pink Persimmon “Baby Clothesline” and “Baby Greetings”
Check out Pink Persimmon stamps HERE.
Ink : SU “Bashful Blue”, Momento “Tuxedo Black”
Patterned Paper : Deja Views “Sharon Ann Baby Collection”
Embossing Folder : Cuttlebug                 Markers : Copic
Die : Spellbinders Nestabilities “Classic Scalloped Rectangels SM”
Flower : Recollections           Deckled Scissors : Fiskars

Adhere card front to back side of brown cardstock and trim around edges with deckled scissors.  Trim patterned paper.  Cut scalloped rectangle from brown cardstock.  Trim white cardstock, emboss, and adhere to scalloped rectangle.  Adhere panel to patterned paper then wrap with tuelle.  Adhere panel to card front.  Add flower.  Stamp sentiment and hand cut into a flag.  Adhere to yellow cardstock and trim.  Stamp bear, color with markers and trim.  Stamp script background in blue ink and use with yellow cardstock to paper piece outfit.  Color trim on outfit with brown marker.  Adhere outfit, bear, and banner to card front.  

Gift Bag

Stamps : Pink Persimmon “Baby Clothesline”, “Ric Rac Circle”, and “Little Cuties”
Ink : SU “Bashful Blue”, Tsukineko “Brilliance Pearlescent Brown“, Tsukineko “VersaFine Onyx Black”  
Pearl : Martha Stewart    

Stamp ric rac circle with blue ink and trim.  Stamp ducks inside ric rac circle and on yellow cardstock in brown ink.  Trim yellow duck bodies from yellow cardstock and adhere.  Color bow with blue marker.  Stamp sentiment.  Stamp brown ink on yellow cardstock, trim, and embellish with blue pearl.  Adhere tuelle and star.

Banner

Stamps : Pink Persimmon “Big Banner with Rosettes”, “Baby Clothesline”, “Little Cuties”,  and ATC Backgrounds -“Springtime” “ Fairy Tale”, and “Spelling Bee“  
Ink : SU “Bashful Blue”, Tsukineko “Brilliance Pearlescent Brown“
Yellow cardstock : unknown       Pearl : Martha Stewart
Markers : Copic    
Chipboard Letters : Paper Studio

Stamp gingham pattern with brown ink on white cardstock.  Stamp flag image twice for each flag.  Once on white cardstock, and once over the brown gingham pattern.  Trim flags from white cardstock around the scalloped edges.  Trim along stitch line around each gingham flag and adhere to white flags. Stamp rosette with blue ink on white cardstock x 4 and trim.  Stamp star image on yellow cardstock, trim, layer onto rosette and adhere both to bottom of each flag.  Add blue pearls.   Punch holes in corners of each flag and slide onto yellow tuelle.   Paint chipboard letters yellow and adhere to flags.  Stamp ATC backgrounds with blue ink on white cardstock.  Stamp sleeper image over blue polka dot pattern, trim and color trim with brown marker.  Stamp onsie image over blue word pattern, trim and color trim with brown marker.  Stamp outfit over script background and on yellow cardstock.  Paper piece outfit together and color trim with brown marker.  Embellish banner with baby clothes.


Sunday, November 11, 2012

Denami "Thoughtful Thank You" Blog Hop


Good morning card makers.  Today I'm sharing several baby projects with you.  The first is a baby thank you card designed for the Denami "Thoughtful Thank You" Blog Hop.  You will have a chance to win a store gift certificate so I hope you will join us!  See all the details below!


I created my baby thank you card using "Giraffe" and "Teeny Heart Background".  I think this little guy is just perfect for a boy or girl card!  Patterned paper, ribbon, and sticker "thank you" are all from my stash.  I also used deckled scissors (Fiskars), Oval and Scalloped Oval dies (Spellbinders), and scalloped border punch (Fiskars).


I created a baby congrats card and gift bag as well.


I used "Giraffe" and "Congratulations Circle" for this set.


 I created the diamond background on the top panel using my Score-Pal and stitched on little white seed beads.


This baby congrats was designed using "Polka Dot Elephant" and "Congratulations Circle".

Do you remember the little thanksgiving chick card I posted a while back HERE???  Well I just got more of those little cutie patooties!!  Denami has a huge collection of these cuties for lots of different occasions.  So if you are a chick lover, check them out HERE.  I now have them for Christmas, Valentine's Day and Easter as well!!  I'm lovin' the Telephone Chickies and the "I'm glad to call you my friend" sentiment

Hope you are inspired to do some stamping and card making this week!
hugs, Melisa


************************************************************************

Blog Hop Details


If you are participating in the hop and joined me from Jennifer Harris's blog ... then your in the right spot.  If you get lost along the way .... you can always hop over the the Denami blog for a full list of blog participates.


When: The blog hop starts on November 11th at 6 AM, PST. However, you have until November 12, 2012, 11:59 pm PST, to leave comments on all the blogs (to be eligible for a prize).


Why: To be inspired by fun DeNami Design creations and also the chance to win mini shopping sprees on the DeNami Design website!


Prizes: We are giving away THREE $20 gift certificates to our website! We'll be giving away one gift certificate to a random participant (DT members not eligible) and then we'll also be giving away TWO gift certificates to TWO people who comment along the hop!


Your next stop in the blog hop is

Lynda Lindley


Wednesday, August 8, 2012

4 Ways to use masking with your stamps


Hello Stampers.  I haven't blogged in several month's and I'm trying to get back into the swing of it.  Today I'm sharing some cards I whipped up using some of my newest stamps.  I love the vintage / collage look of these images.  They are from Red Rubber Designs.  Red Rubber Designs is owned by a very sweet lady I met when I was a The Angel Company Demonstrator.  After I heard that The Angel Company had closed it's doors I was so excited to here that Pam had decided to continue sharing some of there wonderful images but in the retail market now.  You can read more about Pam HERE.  The stamps are sold as rubber sheets, so don't forget to purchase a sheet of cling mount with your order.

You can read more about mounting your rubber stamps using cling mount a hot knife / scissors at the bottom of the post.

I used 2 sets, "Just Bee-Cuz" and "Background Soup".  My favorite section is the "Vintage" sets.  LOVE the collage look and these images make it so easy to whip up a quick collage looking card.  The first card was designed using "masking".  You can read more about "masking" at the bottom of the post.

I used several very basic stamp techniques on the following.


On this one I stamped the image repeatedly to create a background.


On this one I stamped the image twice.  Once on the patterned paper (because I didn't want to try and trim all the little fuzzy details or antennas.  I stamped the image again on cream cardstock, trimmed and then adhered over the image stamped on the patterned paper.


On this one I stamped directly on the patterned paper.

You can view all my Red Rubber Designs projects HERE.

More about masking :
1.  The polka dot stamp image was a little longer than I needed, so I used a post-it note to mask off the left side of the card on this one and the lower part of the card on the 2nd one.  You can just use a regular piece of paper if you don't have a post-it.  The post-it works great because it has just enough adhesive to hold it in place.

2.  On card #1, I cut a window (2.5" x 3") out of a piece of light weight cardstock.   Regular paper works fine, but the light weight cardstock will hold up better and now I can use it repeatedly.  I placed the window over the front of the card.

3.  I stamped the baby carriage once in the center of the window and again on Eclipse Masking tape.  I cut the image from the masking paper and covered the image on the front of the card.

With the window mask still in place, I started stamping from right to left, the alphabet image, and then the polka dots x2.

4.  Masking Fluid -  Brush it over the area you want to mask.  After you are finished with your technique, peel the mask off by gently rubbing with your finger.


More about mounting your stamps :
I love to purchase my stamps as plain red rubber if they are not available already mounted on cling.  That's because store all my stamps in notebooks by either manufacturer or catagory.  So, if my stamps are own blocks, I have to remove the rubber, put them on cling mount and then cut them out with my hot knife / or rubber cutting scissors.  So I love buying just the red rubber, it saves me a step.  The hardest part of converting from wood to cling is sometimes getting them off the block.  If they are resistant, I put them in the microwave for 20-30 seconds to soften the adhesive.  Most of them come off pretty easily after that, but then I sometimes have to rub my thumb back and forth over the back of them to remove some of the adhesive.  You can view a video on how to mount your rubber stamps using "Easy Mount and a Hot Knife"  HERE.  I purchased my hot knife years ago in the woodburning section at Joann's Crafts.  If you have a pair of the Tonic Scissors, then just lay the "full" sheet of rubber over a sheet of cling mount.  Then just cut through the rubber and cling all at once and your scissors stay pretty clean.  If the stamps do not have any rubber space around them or are already trimmed close to the image, then you place it on the cling mount and use a hot knife.  You do not want to use your scissors to trim in this instance because the adhesive is going to stick to the scissors as you cut through the cling mount.  In the video she demonstrates how to use the hot knife with a glass mat.  I have never done it this way.  The knife is really hot and cuts through the cling mount like butter.  I just hold the stamp / cling mount up in the air / off the table and glide the hot knife blade around the edge of the rubber.  I have never had any burning accidents doing it that way, but of course you should do whatever is safest for you.  This is the way I do it most of the time instead of the scissors.  Why?? I'm cheap and I don't want to waste any of the cling mount.  So I cut the images out first, as close to the image as I can, and the place it on the cling mount.  Then trim with the hot knife.

************************************************

Challenges


Woowhoooo!!!  I won $30 free Denami stamps for playing along with the SSIC challenge!!


Card #1
CPS - Sketch
SSIC - baby or pastels
The Crazy Challenge - Black and White plus one other color
The Ribbon Carousel - stitching
Crafty Catz - pink

Card #2
Creative Inspirations - anything goes
Simon Says - BINGO (ribbon, free, blooms(patterned paper)
Fussy and Fancy  - Vintage distressing (torn paper) and lace

Card #3
 CAS-ual Fridays - things you would see in the sky (bee)
Sweet Stampin' - book or book text

Card #4
Tuesday Throwdown - on the move
No Matter Which - anything goes

************************************************


Project Details

You're the best
Stamps : Red Rubber Designs "Just Bee-Cuz" and "Background Soup"
Patterned Paper : Colorbok (yellow), Jennie Bowlin (book paper)
Ink : Tsukineko VersaFine Onyx Black

Mask off left side of card and stamp polka dot strip twice.  Adhere torn book paper.  Adhere patterned paper strip.  Stamp sentiment and car.  Embellish with lace scrap.

Just Bee-cuz #1

Stamps : Red Rubber Designs "Just Bee-Cuz"
Patterned Paper and tag : Colorbok "Antique Paperie"
Ink : Tsukineko VersaFine Onyz Black

Stamp bee repeatedly on top 1/2 of cream card.  Cover lower 1/2 with patterned paper.  Adhere lace across seam.  Adhere paper tag, stamp sentiment and bee on tag.  Stamp bee again on cream cardstock, trim and adhere over bee on tag.  Embellish with ribbon / bow.

Just Bee-cuz #2
Stamps : Red Rubber Designs "Just Bee-Cuz" and "Background Soup"
Patterned Paper : Colorbok (yellow), Jennie Bowlin (book paper)
Ink : Tsukineko VersaFine Onyz Black

Mask off lower part of card and stamp polka dot strip twice.  Adhere torn book paper.  Adhere patterned paper strip.  Stamp bee and sentiment.  Stamp bee on cream cardstock, trim and adhere over bee on patterned paper.  Embellish with lace scrap.


Monday, January 9, 2012

My first VIDEO TUTORIAL!


Hello everyone. Today I want to share a tutorial on how to create this shabby chic treat basket designed using a couple of basic Spellbinder's dies. I made mine for Valentine's Day, but the basket is something that could be used for weddings, baby showers, birthdays and other holidays as well.
For this project I created my first video tutorial. You are invited to watch it over on my You-tube channel : PaperliciousDesigns .... but no laughing, teehee. Ok .... you can laugh, because I"m laughing along as well. I can tell you it's wasn't as easy as I thought it would be and I certainly hope I improve.

You can check out the video HERE

thanks for stopping by!
Melisa

You can view all of my Valentine projects HERE.
You can view more of my projects that I have used Spellbinders Dies on HERE.
You can view all of my Shabby Chic projects HERE.
You can view all of my Treat Boxes / Bags HERE.
You can view all of my project that have a You Tube Video as well HERE.

***************************************************************************

PROJECT DETAILS 

Supply List :

Spellbinders Dies Nestibilities and Grand Calibur: Classic Hearts Classic Scalloped Heart (second from the smallest) Classic ScallopedSquares LG (second from the largest)Classic ScallopedRectangles LG (largest)
Vintage Digital Images – Digitalimage4You shop on Etsy.com. The image I used is from an 8 ½” x 11” sheetthat included 9 backgrounds, called “Greetings and Kisses Vintage Backgrounds
Pink Cardstock
Patterned Paper – My Minds Eye 6x6 paper pad – Lost & Found MadisonAvenue
White streamer paper
White 3/8” ribbon
White rose –
Wild Orchid Crafts
White heart hat pins – Maya Road
White Enamel Accents – Ranger
Glitter Glue – Stickles Frosted Lace
Scalloped and Deckled Scissors – Fiskars
Wire Cutters
Aleene’s Tachy Glue

Templates / Cutting and Scoring Measurements


*************************************************************

 Link Parties

Nifty Thrifty Sunday @ Nifty Thrifty Things
Sundae Scoop @ A Time To Create
Sister Sunday Link Party at Sister of the Wild West
The Sunday Showcase @ Under the Table and Dreaming
Make Monday Marvelous @ C.R.A.F.T.
Made by You Mondays @ Skip to my Lou
Inspire Me Monday @ Singing Three Little Birds
Uncommonly Yours @ Uncommon Designs Online
Whatever You Want Wednesday @ Free Pretty Things
WOW Me Wednesday @ Gingersnaps Crafts
A Crafty Soiree @ Katie's Nesting Spot
Watcha Got Weekend @ Lolly Jane Boutique
Show and Tell Friday @ My Romantic Home
Feathered Nest Friday @ French Country Cottage
Strut Your Stuff Saturday @ Six Sister' Stuff
Check Me Out Saturday @ A Vision to Remember

This project is featured at Passionatelly Artistic


Wednesday, September 28, 2011

Sweet Baby Girl Layout

9x9 Layout

Good Morning Paper Crafters!  I bet you are wondering who this little cutie patootie is??  It's my neice 21 years ago.  What a sweet little face.  So I needed a sweet little layout to go with it. 
I wanted to use my "Baby Clothesline" set by Pink Persimmon, so I headed out to Archivers in search of the perfect patterened paper to create my layout with.  As soon as I seen this patterned paper I grabbed it.  I knew it would make a great shabby layout.  It's part of the My Mind's Eye "Blush" line.  It came in a 6x6 paper pad as well so I grabbed one, knowing the small patterns would be perfect for paper peicing the little clothes.  This set comes with the cutest little clothes pins so that you can create a little clothesline, adorable boy and girl clothes, and some cute little toys as well.  LOVE it!


I wanted to use my "Small Banner" set with the "Small Carnival Alpha" set though,  so I opted to layout the clothes randomly.  The Small Banner set comes with 6 different little patterns that you can choose to stamp your banner in.  You stamp the inside first, then the outside in black.  Then stamp your letters on each banner.  I colored the inside of the letters with a Copic marker R85.

I paper peiced the dress and bloomers.  I stamped the sweater, booties, and bunny on pink cardstock and then added shawdowing with my Copic Markers.  I used RV0000 with R85, tip to tip.  R85 would have been to dark to apply directly to paper.  I created a great shading by picking up a little R85 on the tip of my RV0000 markers.  I shaded the birds with N00.

It's hard to see in the photo, but I added glitter to the stripes in the dress, around the edges of the banners, over the birds, and over the swirly. 
I wanted to create a shabby mat so I layered 3 peices of pink.  I distressed the edges of layer one using a distressing tool.  I used my deckled scissors on layer 2.  I inked all the edges with Pearlescent Chocolate ink.   
To help create an interesting border along the side of the mat, I layered eyelet lace with white party streamer that I had gathered into a ruffle.  I needed more white on the layout so the clothes would show up, so I added some wide lace. 

I hope you are inspired to create a sweet little baby boy or girl layout of your own!
hugs,
Melisa

Check out Pink Persimmon stamps HERE.

You can view all of BABY themed projects HERE.


**************************************

Supplies
Stamps : Baby Clothesline, Small Banner and Small Carnival Alpha sets by Pink Persimmon
Patterned Paper :  My Mind's Eye "Blush" line
Ink : Brilliance Pearlescent Chocolate, and Momento Onyx Black
Glitter : Stampendous
Small Roses : $1 aisle at Micheals SCORE!!
Wide Lace in background : I just bought it at Hobby Lobby
White party streamer, buttons, small eyelet lace, and chipboard : my stash
Distressing tool :  My favorite is by Making Memories.  But I also use the one by Tim Holtz.

Monday, August 29, 2011

Wanna win some Pink Persimmon Stamps?


Good Morning Paper Crafters.  I'm posting today to let you know how you can win some Pink Persimmon stamps!!  Pink Persimmon is sponsoring The Shabby Tea Room's Challenge this week.  The challenge is to create a project using the color of your birth stone.  I was born in December so I had to use the blue zircon.  I added a little splash of yellow as well.  I hope that was ok.  To read all the details on how to qualify for this challenge hop on over!
Thanks for stopping by!
Melisa

***************************************

Project Details
Stamps : Baby Clothesline by Pink Persimmon
****Digital Bingo Card : Lindsey's Stamp Stuff  FREE!!!!!  HERE
If you download it, then please stop and leave Lindsey a thank you message on her blog HERE.
Lindsey had lots of great digital images, including SVG files. ***

Patterned Paper : October Afternoon Road Map Collection 2009
White party streamer sprayed with Glimmer Mist - Daffodil
I gathered it with thread and created a ruffle
Yellow Cardstock
Deckled Scissors : Fiskars

The sleeper was colored with chalk, because I couldn't get the right shade of blue with my Copics.  I used the edge of an eraser to try and remove what I could of the chalk on the trim, then colored with Copic Y00.  The had was paper peiced.  The ducks were stamped once on the blue paper and then again on yellow cardstock.  I timmed the ducks, added some shading with using Y0000 tip to tip with E35.  I printed the Bingo card twice, colored the inside of the letters on the second one, cut the letters out and adhered them to the first bingo card.

*************************************************

You can view all of my Baby projects HERE.

You can view all of my Pink Persimmon projects HERE.

Tuesday, March 8, 2011

Cute as a Button : Girl!

Good Morning Papercrafters.  I am sharing a baby card today.


Designed using Creative Cuts and More A7 Scalloped border card and "Little One" clear stamp set by Clear and Simple.
Border Punches : EK Sucess
Tuelle : Bazzill
Cuttlebug Swiss Dots embossing folder
Spellbinders Labels One and my Grand Calibur!

Not sure what I'm talking about??  Here it is ...
I love the way this baby cuts and embosses with my Spellbinders Dies!

You can actually pick one of at Hobby Lobby.  Not sure, but I bet you could use a 40% coupon.

You can view all of BABY themed projects HERE.

Saturday, February 19, 2011

Cute as a Button Ensemble : Boy!


I have created several ensembles using Creative Cuts and More products.  I just LOVE those shoes!


A7 Scalloped Card Creative Cuts and More
Stamps : "Little One" by Clear and Simple
Ink : Brilliance Pearlescent Chocolate Tsukineko
Patterned Paper : Reminisce
Spellbinders Circle and Scalloped Circles Nestibilities
Deckled Scissors : Fiskars
Border Punch : Fiskars


Shoes : Creative Cuts and More, come pre-cut and pre-scored.  
You fold and adhere.  These shoes are a little tricky and hard to line up perfectly around the bottom.  So be prepared to add the bead fiber like I did or even a scalloped border (border punch).  I also had to trim the insole a little to make it fit.  I have a tutorial on how I created mine using the Swiss Dots embossing folder. 


Diaper Invitation : Creative Cuts and More
Patterned Paper : Reminisce
Border Punch : Fiskars


Thanks for stopping by!  I hope your weekend is blessed!
hugs,
Melisa

You can check out all of my baby creations HERE.

Saturday, February 12, 2011

Baby Ensemble

Good Morning Papercrafters.  It's going to be an exciting day today.  We do the walk through for the house and then close next friday!  And then life will REALLY get busy, getting ready to move.  But it will be a fun busy.  I hope you are all staying warm.  It's been cold here, but the good news is, we will be back up into 70's next week.  Hey ... don't be a hater!  teehee.   


This is a set that I have submitted FOUR times.  I give up, teehee.  And now I can share it on my blog.
The Popcorn box, Scalloped card and baby shoes are all Creative Cuts and More, pre-cut, pre-scored dies.  You fold and adhere.  I have posted a tutorial in the past on how I make the shoes, and you can check it out HERE.  The shoes are a little challenging the first time since I am a perfectionist.  But I got better at it, the more I made.  Be prepared to use some trim along the bottom to cover up any area's that don't go together perfectly.  But they are worth figuring out, because they are so stinkin' cute!!  And what a hit they would be at a baby shower.


Thanks for stopping by!
Melisa

    *********************************************************

THE DETAILS

Stamps : "Flower Child" by Layers of Color on card, and "Baby" by Melissa Frances on gift box.
 Baby shoes, gift box, and scalloped card - Creative Cuts and More
Cardstock - Unknown Green paper on card - Making Memories
Copic Markers (card)
Ink - Momento Tuxedo Black, Versa Magic - Pixie Dust, SU - Old Olive
Cuttlebug embossing template,
Martha Stewart border/corner and border punches.
Tag Punch - EK Success.
Deckled Scissors - Fiskars.
Tuell - Bazzill,
Green bead fiber (Hobby Lobby) and pink ribbon - local craft store, green ribbon - The Angel Company.
Brads - Paper Studio,
Stick Pins - unknown
Card - Cut white panel 3 1/2 x 5 1/4" and run through Big Shot using Cuttlebug embossing folder. Ink dots and edges. Add green brads. Use Martha Stewart border/cornet punches to create pink panel. Stamp tree and color with Copic Markers. Ink edges with green ink. Use a Dove Blender replacement tip to ink inside small holes around border. Stamp baby carriage, color with Copics and trim. Adhere to front of pink panel. Trim green paper to create borders, using deckled scissors along the top and Martha Stewart border punch along the bottom. Adhere panels and borders to front of pink scalloped card by Creative Cuts and More. Tie tuell around lower border and add stick pins.

Gift Box - So easy using Creative Cuts and More. It came pre-cut and pre-scored. Traced pattern for front panel and trimmed. Ran panel through Big Shot using embossing folder. Ink with VersaMagic Pixie Dust over dots and SU Old Olive around edges. Created pink border using Martha Stewart border punch. Created upper border with deckled scissors. Tied pink sheer ribbon around top of panel. Adhered panel to front of gift box. Punched tag and stamped sentiment. Inked edges and adhered

Shoes - Come pre-cut and pre-scored from Creative Cuts and More. I ran mine through the Big Shot with a Cuttlebug embossing folder. Rubbed VersaMagic Pixie Dust ink over the dots. Folded and adhered using Killer Red Tacky Tape. Ink edges with SU Old Olive. Adhered green bead fiber around bottom of shoes. Added decorative brad to strap. Added green bow on top of shoes.

******************************************************************

You can view more of my Creative Cuts and More projects HERE.

You can view more of my Layers of Color projects
HERE.

You view more Gift Bags / Boxes
HERE.

You can view more BABY projects HERE.

Wednesday, September 22, 2010

Baby Diaper Shower Invite / Baby Shoes Favor


Hello Paper crafters!  Today I am sharing projects that are just perfect for a baby shower / gift!
I went a little shabby with this ensemble.  Aren't these so cute!!  I used the Diaper Card with Pin, the Baby Shoes, and A7 Fancy Frame Window with Clear and Simple's "Little One" stamp set.  And I just hopped over and found another baby set called "Rock-a-Bye".  It has the cutest little rocking horse!


This "Diaper Card" die comes in 2 pieces, pre-cut and pre-scored, the actual diaper and the diaper pin.  When you order make sure you note that you get to select different colors for each one.  It does not come with the inside card.  I decided to make mine a mock baby shower invite.  I covered it with old book paper and inked it up with some brown ink.  I love the lace along the legs.  The button is part of the Clear and Simple "Little One" stamp set.


This is the A7 Fancy Frame Window Card.  It's so much fun to design the inside of the card creatively as well with just a little part peeking through the window.
I used one of the words from the "Little Ones" stamp set to create my background border.  I used the old book paper again.  I fan folded it to create the border.  The buttons are from the stamp set and I colored them with chalk.  The paper for the buttons is Jenni Bowlin. 


See the little heart.  You can't tell from the photo, but it is made of velvet paper!!  Yes, Creative Cuts and More sells velvet paper.  It's so cool.  I just used my Spellbinders die to cut it out and inked the edges.


And here's the inside.


Tutorial for Shoes
They come in your choice of card stock and color.
I guess you can see, that I like running mine through the Big Shot with my polka dot embossing folder.  Here are some photo's of how to do that.


Then you just turn the die around in the folder.  Here is the tricky part.  There is about a 1/4" area along the end of the folder that doesn't emboss.  When you emboss the 2nd half of the shoe, that strip will flatten out a few of your dots on the other end.  So, try to roll the foler through up to that point and then bring it back out. *** Do not roll it all the way through.***  I didn't know this when I made the first pair, so I used my stylus to re-indent the dots that were flattened when I did the second half.

Next I add a little ink around the edges and lightly over the shoe.


Wrap the shoe around as shown and adhere.  I highly recommend the Killer Red Tacky Tape for this project.  Next I bend the little tabs at the score line so that they are ready to be adhered.  There are some longer ones and I cut them into 3 tabs.  The kit comes with outer and inner soles.  Lay the top of the shoe on top of the outer sole as best you can.  I'm sure there are some people who can do this perfectly.  I'm not one of them, teehee.  If there is and sole extending from the shoe I just trim it off.  Now if I had adhered the shoe top to the outer sole perfectly, then I'm sure the inner sole would have fit perfectly.  But mine didn't.  So I turned the shoe over to look at the shape and trimmed my inner sole to fit just inside the shoe.  When I go to insert it, I pinch it up a little (squeeze the sides of the inner sole to make it concave a little).   This makes it easier to slide it into the shoe. 

You can check out more of my baby creations HERE.
Related Posts Plugin for WordPress, Blogger...